Silverlight Prism フレームワークを利用してMVVMアプリケーションを作成してみる 第1回
Prismの情報も少ないので、開発ガイドも購入してみた。
・・・・のだが、MSDNで公開されている内容と同一だった。うーーん。若干恐れてはいたのだが、ちょっとタイトルが異なっていたので別の内容であることに賭けたのだが。
で、あまり時間がないので、QuickStart のサンプルを概観
と、主だってやりたいところのニュアンスはつかめた。。。ような気がするので、Hands-On Lab を見ながら、1からアプリケーションに、Prism フレームワークを適用させていきたいと思う。
題材・前提
以前作成した、ソフトウェア開発見積のための、ファンクションポイント計算サイトのクライアントをSilverlightアプリケーションとしてつくることを題材として進めていく。
DIコンテナは、MEFを利用する。
第1回は、モジュールの分割と、UI合成が動くところまで。
準備
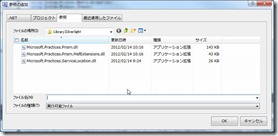
ソリューションのフォルダに、Library.Silverlight フォルダを作成し、以下のアセンブリをコピーする。アセンブリは、%Prismのインストールフォルダ%\Bin\Silverlight にある。
- Microsoft.Practices.Prism.dll
- Microsoft.Practices.Prism.MefExtensions.dll
- Microsoft.Practices.ServiceLocation.dll
Shell のセットアップ
1.ソリューションエクスプローラーから、MainPage.xaml を Shell.xamlにリネーム
2.Shell.xaml.cs を開き、コードビハインドから、Shellに名前変更のリファクタリング
3.Shell.xaml を開き、UserControllの、x:Class の値が、上記2のコードビハインドのクラスと一致することを確認
- <UserControl x:Class="PmToolsClient.Shell"
- xmlns="http://schemas.microsoft.com/winfx/2006/xaml/presentation"
- xmlns:x="http://schemas.microsoft.com/winfx/2006/xaml"
- xmlns:d="http://schemas.microsoft.com/expression/blend/2008"
- xmlns:mc="http://schemas.openxmlformats.org/markup-compatibility/2006"
- mc:Ignorable="d"
- d:DesignHeight="300" d:DesignWidth="400"></UserControl>
4.Shell.xaml.cs の Shellクラスに、Export アトリビュートを付与しコンテナに登録させる
型を登録する場合、Export(typeof(型))、名前を登録する場合、Export("名前") プロパティやメソッドも対象にできる様だ。
- using System.ComponentModel.Composition;
- using System.Windows.Controls;
- namespace PmToolsClient
- {
- [Export]
- public partial class Shell : UserControl
- {
- public Shell()
- {
- InitializeComponent();
- }
- }
- }
Region
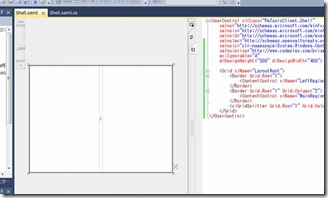
Shell.xaml にRegionを追加する。
- xmlns:prism="http://www.codeplex.com/prism" を追記
- xmlns:c="clr-namespace:System.Windows.Controls;assembly=System.Windows.Controls" を追記
- System.Windows.Controls への参照設定
- <UserControl x:Class="PmToolsClient.Shell"
- xmlns="http://schemas.microsoft.com/winfx/2006/xaml/presentation"
- xmlns:x="http://schemas.microsoft.com/winfx/2006/xaml"
- xmlns:d="http://schemas.microsoft.com/expression/blend/2008"
- xmlns:mc="http://schemas.openxmlformats.org/markup-compatibility/2006"
- xmlns:c="clr-namespace:System.Windows.Controls;assembly=System.Windows.Controls"
- xmlns:prism="http://www.codeplex.com/prism"
- mc:Ignorable="d"
- d:DesignHeight="300" d:DesignWidth="400">
- <Grid x:Name="LayoutRoot">
- <Border Grid.Row="1">
- <ContentControl x:Name="LeftRegion" prism:RegionManager.RegionName="LeftRegion" HorizontalContentAlignment="Stretch" />
- </Border>
- <Border Grid.Row="1" Grid.Column="2">
- <ContentControl x:Name="MainRegion" prism:RegionManager.RegionName="MainRegion" VerticalContentAlignment="Stretch" HorizontalContentAlignment="Stretch" />
- </Border>
- <c:GridSplitter Grid.Row="1" Grid.Column="1" HorizontalAlignment="Center" VerticalAlignment="Stretch" Background="{x:Null}" Grid.RowSpan="2" />
- </Grid>
- </UserControl>
Bootstrapper
- System.ComponentModel.Composition を参照設定に追加(System.ComponentModel.Composition.Hosting 名前空間には、拡張可能なアプリケーションまたはホストの開発に役立つ MEF 用のクラスが用意されています。)
- プロジェクトにBootstrapperクラスを追加
- MefBootstrapper を継承させる
- CreateShell メソッドをオーバーライド : Shellウィンドウのインスタンスを生成する
- InitializeShell メソッドをオーバーライド : Shellをユーザーに表示する
- ConfigureAggregateCatalog メソッドをオーバーライドし、 this.AggregateCatalog.Catalogs.Add(new AssemblyCatalog(typeof(Bootstrapper).Assembly)); で、自身のアセンブリのExportをコンテナに登録
- App.xaml.cs ファイルを開き、Application_Startup イベントハンドラを置き換える
Bootstrapper.cs
- using System.ComponentModel.Composition.Hosting;
- using System.Windows;
- using Microsoft.Practices.Prism.MefExtensions;
- namespace PmToolsClient
- {
- public class Bootstrapper : MefBootstrapper
- {
- protected override DependencyObject CreateShell()
- {
- return this.Container.GetExportedValue<Shell>();
- }
- protected override void InitializeShell()
- {
- base.InitializeShell();
- Application.Current.RootVisual = (UIElement)this.Shell;
- }
- protected override void ConfigureAggregateCatalog()
- {
- base.ConfigureAggregateCatalog();
- this.AggregateCatalog.Catalogs.Add(new AssemblyCatalog(typeof(Bootstrapper).Assembly));
- }
- }
- }
App.xaml.cs
- private void Application_Startup(object sender, StartupEventArgs e)
- {
- // this.RootVisual = new Shell();
- Bootstrapper bootstrapper = new Bootstrapper();
- bootstrapper.Run();
- }
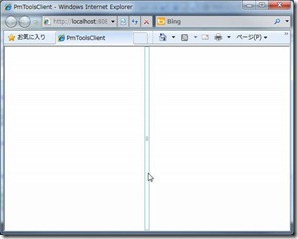
ここまでで、一旦起動
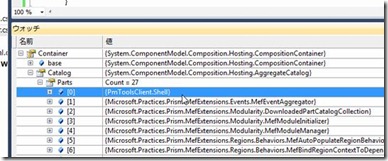
ブレークポイントで、CreateShell で止めて、Containerの中をのぞくと、Shellがカタログに登録されているのがわかる。
モジュールの追加
モジュールの作成
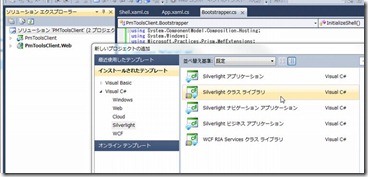
1.新規Sivlerlight クラスライブラリプロジェクトを追加(ソリューションのコンテキストメニューから追加-新しいプロジェクト)
2.プロジェクトに、Microsoft.Practices.Prism.dll 、Microsoft.Practices.Prism.MefExtensions.dll 、System.ComponentModel.Composition への参照を追加
3.自動生成された、Class1.cs の Class1 を リファクタリングを使ってリネーム(ModlueInit)。ファイル名も変更する(ModlueInit.cs)
4.using Microsoft.Practices.Prism.Modularity; を追記
5.IModule を実装させる
6.ModuleExport アトリビュートを追加
7.Initialize() メソッドを実装
- using Microsoft.Practices.Prism.MefExtensions.Modularity;
- using Microsoft.Practices.Prism.Modularity;
- namespace ProjectModule
- {
- [ModuleExport(typeof(ModlueInit))]
- public class ModlueInit : IModule
- {
- public void Initialize()
- {
- }
- }
- }
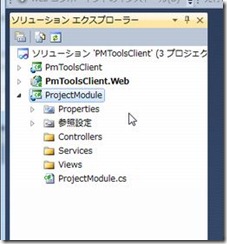
8.Controllers、Services、Views フォルダを追加
9.一旦ビルド
アプリケーションライフサイクルにおいてのモジュール
モジュールは、アプリケーションライフサイクルにおいて、以下の3つのステップを経る
- モジュールは、モジュールカタログにより、発見される。モジュールカタログは、モジュールのメタデータについてのコレクション。メタデータは、モジュールマネージャーサービスによって利用される
- モジュールマネージャーサービスは、モジュールの参照と、続いて起こる初期化を調整する。
- 最後に、モジュールマネージャーは、モジュール初期化クラスのInitialize メソッドを呼び出す。
モジュールカタログの作成
Silverlightでは、コードもしくは、XAMLを利用してモジュールカタログを作成できる
コードからカタログを作成
1.Shellプロジェクトに、モジュールプロジェクトの参照を追加する
2.Bootstrapper.cs ファイルを開き、ConfigureAggregateCatalog メソッドに以下のコードを実装する
- protected override void ConfigureAggregateCatalog()
- {
- base.ConfigureAggregateCatalog();
- this.AggregateCatalog.Catalogs.Add(new AssemblyCatalog(typeof(Bootstrapper).Assembly));
- this.AggregateCatalog.Catalogs.Add(new AssemblyCatalog(typeof(ProjectModule.ProjectModule).Assembly));
- }
3.ビルドして実行
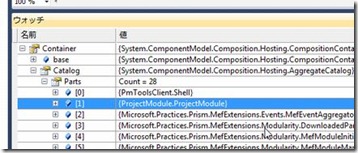
ブレークポイント設定で、カタログにモジュールが追加されたのが確認できる
View の追加
Viewの作成
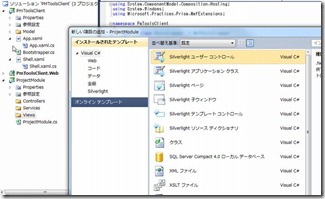
1.モジュールプロジェクトの、Viewsフォルダのコンテキストメニューから、追加 - 新しい項目を選び、Silverlightユーザーコントロールを追加する
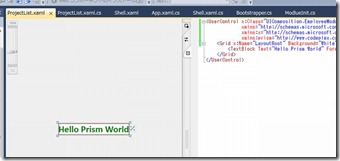
2.一旦、以下の内容としておく。(MVVMパターンには追って対応)
3.コードビハインドからクラスをExport
- using System.ComponentModel.Composition;
- using System.Windows.Controls;
- namespace ProjectModule.Views
- {
- [Export(typeof(ProjectList))]
- public partial class ProjectList : UserControl
- {
- public ProjectList()
- {
- InitializeComponent();
- }
- }
- }
- <UserControl x:Class="ProjectModule.Views.ProjectList"
- xmlns="http://schemas.microsoft.com/winfx/2006/xaml/presentation"
- xmlns:x="http://schemas.microsoft.com/winfx/2006/xaml"
- xmlns:prism="http://www.codeplex.com/prism">
- <Grid x:Name="LayoutRoot" Background="White">
- <TextBlock Text="Hello Prism World" Foreground="Green" FontFamily="Calibri" FontSize="24" FontWeight="Bold"></TextBlock>
- </Grid>
- </UserControl>
RegionManager
RegionManager サービスは、Regionのコレクションの維持とコントロール用の新しいRegionの生成に責任を持つ。このサービスは、Microsoft.Practices.Prism.Regions.IRegionManager インターフェースを実装している。
ShellにViewを表示する
ModuleInit クラスに以下の変更を行う
- using Microsoft.Practices.Prism.Regions; 宣言を追加
- 読み取り専用メンバーを追加 private readonly IRegionManager regionManager;
- ModuleInit クラスのコンストラクタを記述。コンストラクタインジェクションで、IReagionManagerを設定する
- ModuleInit クラスの Initialize メソッドを実装し、RegisterViewWithRegion で、RegionとViewを結びつける
- using Microsoft.Practices.Prism.MefExtensions.Modularity;
- using Microsoft.Practices.Prism.Modularity;
- using Microsoft.Practices.Prism.Regions;
- using System.ComponentModel.Composition;
- namespace ProjectModule
- {
- [ModuleExport(typeof(ModlueInit))]
- public class ModlueInit : IModule
- {
- private IRegionManager regionManager;
- [ImportingConstructor]
- public ModlueInit(IRegionManager regionManager)
- {
- this.regionManager = regionManager;
- }
- public void Initialize()
- {
- this.regionManager.RegisterViewWithRegion("LeftRegion", typeof(Views.ProjectList));
- }
- }
- }
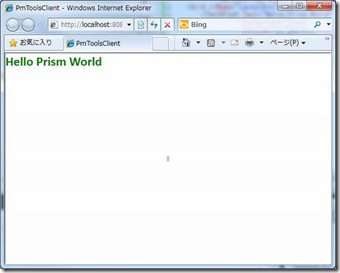
実行
とりあえず、ここまではなんとかOK。
