Google App Engine(Java)+Spring Boot+Vuetifyから、Google Cloud Vision APIを呼び出しOCRを実現
ファイルのアップロードができるようになったので、Google Cloud Vision APIを呼び出し、アップロードした画像をOCR解析してみる。
1.Google Cloud APIクライアントライブラリを使用
以下のURLの手順にしたがって、チュートリアルをこなし、疎通を確認。
https://cloud.google.com/vision/docs/libraries?hl=ja#client-libraries-install-java
さて、上記チュートリアルでは、サービスアカウントKEYをローカルで管理するのだが、GAEに上げるときにはどうするのだろう?
調べるのが面倒なので、いったん、デプロイ、API呼び出しを実行してみて、エラーログを確認してみる。
URLにアクセスして、APIを有効化しなさいと。
[b~favophrase/1.417820383360958412].<stderr>: com.google.api.gax.rpc.PermissionDeniedException: io.grpc.StatusRuntimeException:
PERMISSION_DENIED: Cloud Vision API has not been used in project 512734593206 before or it is disabled.
Enable it by visiting https://console.developers.google.com/apis/api/vision.googleapis.com/overview?project=99999999999 then retry.
If you enabled this API recently, wait a few minutes for the action to propagate to our systems and retry.
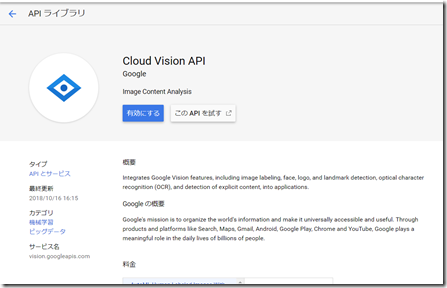
アクセスすると、あぁ、この画面ね。確かに。
ということで有効化する。
2.GAE Java(Spring Boot)側の実装
2.1 CloudVIsionService
Google Cloud VIsion API を呼び出すユーティリティサービスを、Spring サービスとして作成。
上記チュートリアルのサンプルコードに、OCRのドキュメントを見ながら、少し手を加える。
テキストが、画像上に表示されている位置情報などもあるのだが、とりあえず、解析結果”description” だけ取得するようにする。
動かしてい見ると、最初に解析結果全体が与えられて、以降、ブロックごとに取得できるようなので、とりあえず先頭のみ抜き出すようにコードを書いておく。
- package info.typea.google.api.cloudvision;
- import java.io.ByteArrayOutputStream;
- import java.io.DataInputStream;
- import java.io.InputStream;
- import java.util.ArrayList;
- import java.util.HashMap;
- import java.util.List;
- import java.util.Map;
- import java.util.logging.Logger;
- import org.springframework.stereotype.Service;
- import com.google.cloud.vision.v1.AnnotateImageRequest;
- import com.google.cloud.vision.v1.AnnotateImageResponse;
- import com.google.cloud.vision.v1.BatchAnnotateImagesResponse;
- import com.google.cloud.vision.v1.EntityAnnotation;
- import com.google.cloud.vision.v1.Feature;
- import com.google.cloud.vision.v1.Feature.Type;
- import com.google.cloud.vision.v1.Image;
- import com.google.cloud.vision.v1.ImageAnnotatorClient;
- import com.google.cloud.vision.v1.WebDetection;
- import com.google.protobuf.ByteString;
- import com.google.protobuf.Descriptors.FieldDescriptor;
- @Service
- public class CloudVisionService {
- private static final Logger logger = Logger.getLogger(CloudVisionService.class.getName());
- public List<String> getOcrDocumentText(InputStream in) {
- Map<String, Object> annotateMap = annotateImage(in, Type.DOCUMENT_TEXT_DETECTION);
- @SuppressWarnings("unchecked")
- List<String> result = (List<String>)annotateMap.get("description");
- return result;
- }
- public Map<String, Object> annotateImage(InputStream in, Type type) {
- Map<String, Object> result = new HashMap<>();
- try(
- DataInputStream reader = new DataInputStream(in);
- ByteArrayOutputStream writer = new ByteArrayOutputStream();
- ImageAnnotatorClient vision = ImageAnnotatorClient.create()) {
- byte[] buf = new byte[1024];
- while(reader.read(buf) >= 0) {
- writer.write(buf);
- }
- byte[] data = writer.toByteArray();
- ByteString imgBytes = ByteString.copyFrom(data);
- List<AnnotateImageRequest> requests = new ArrayList<>();
- Image img = Image.newBuilder().setContent(imgBytes).build();
- Feature feat = Feature.newBuilder().setType(type).build();
- AnnotateImageRequest request = AnnotateImageRequest.newBuilder()
- .addFeatures(feat)
- .setImage(img)
- .build();
- requests.add(request);
- BatchAnnotateImagesResponse response = vision.batchAnnotateImages(requests);
- List<AnnotateImageResponse> responses = response.getResponsesList();
- for(AnnotateImageResponse res : responses) {
- if (res.hasError()) {
- System.out.printf("Error:%s\n", res.getError().getMessage());
- }
- switch(type) {
- case TEXT_DETECTION:
- case DOCUMENT_TEXT_DETECTION:
- for (EntityAnnotation annotation : res.getTextAnnotationsList()) {
- annotation.getAllFields().forEach((k,v) -> {
- // TODO とりあえず、OCRの解析結果のみ保持。先頭にすべて、以降にブロック?ごとの解析結果が格納されている。
- if ("description".equals(k.getName())) {
- List<String> discriptions = (List<String>)result.get("description");
- if (discriptions == null) {
- discriptions = new ArrayList<>();
- }
- discriptions.add(v.toString());
- result.put(k.getName(), discriptions);
- }
- });
- }
- break;
- // TODO 他のタイプ処理
- }
- }
- } catch(Exception e) {
- e.printStackTrace();
- }
- return result;
- }
- }
2.2 アプリケーションAPI
ファイルのアップロードを受け付けるアプリケーションのAPIから、上記のCloudVisionService を呼び出す。@Autowired アノテーション付与したメンバーとして宣言しておく。
前回JSONで返すためのMapに”text”エントリーを追加する。
- @PostMapping("/api/upload-file")
- public ResponseEntity<Map<String,String>> uploadFile(
- @RequestHeader(name="Origin", required=false) String origin,
- @RequestParam("file") MultipartFile file,
- @RequestParam("fileName") String fileName) {
- HttpHeaders headers = new HttpHeaders();
- headers.add("Access-Control-Allow-Origin", origin);
- List<String> discriptionList = null;
- try {
- discriptionList = cloudVisionService.getOcrDocumentText(file.getInputStream());
- } catch(Exception e) {
- }
- Map<String,String> result = new HashMap<>();
- result.put("message", "file uploaded success.");
- result.put("fileName", fileName);
- result.put("text", ((discriptionList == null || discriptionList.isEmpty())?"":discriptionList.get(0)));
- return new ResponseEntity<>(result, headers, HttpStatus.OK);
- }
3.Vuetify側の実装
3.1 OCR結果出力領域
UI側で、{{ text }} に画像ファイルをアップロードしOCRをかました結果のテキストを表示させる、エリアを用意。
- <pre>{{text}}</pre>
3.2 AxiosによるAjax通信
- UIとバインドする、”text” を、data() に定義
- axios.post(…).then((response) => { …} ) にて、this.text に結果オブジェクトのtext要素をセットする
- <script>
- import axios from 'axios';
- export default {
- name: 'FavoPhrase',
- data() {
- return {
- file: '',
- fileName: '',
- text: 'initial annotate.',
- }
- },
- methods: {
- sampleAjax : function() {
- axios.get(process.env.VUE_APP_API_BASE_URL + "/api/hello")
- .then((res) => {
- alert("status=" + res.status + ":" + res.data);
- });
- },
- handleFileUpload: function(e) {
- this.file = this.$refs.file.files[0];
- if (this.file) {
- this.fileName = this.file.name;
- }
- },
- submitFile: function() {
- let formData = new FormData();
- formData.append('file', this.file);
- formData.append('fileName', this.fileName);
- console.log(formData);
- axios.post(process.env.VUE_APP_API_BASE_URL + "/api/upload-file",
- formData,
- {
- headers: {
- 'Content-Type': 'multipart/formdata'
- }
- }
- ).then((response) => {
- this.text = response.data.text;
- console.log(response.data);
- }).catch((response) => {
- alert("Faiure!\n" + response);
- });
- }
- }
- }
- </script>
3.動作確認
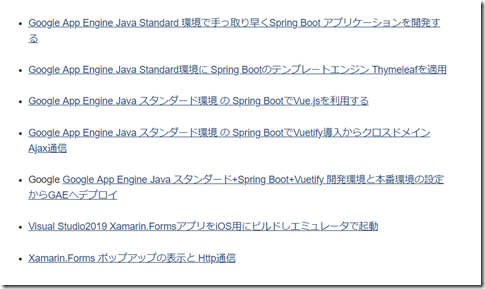
このブログの先頭部分をキャプチャした、以下の画像を読み込ませてみる。
text.png
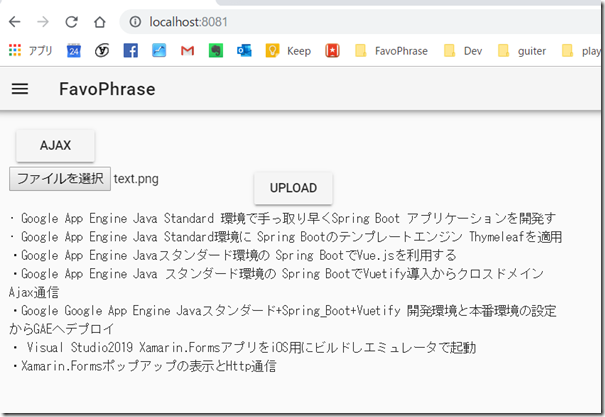
おぉ、結果が表示された!
かなり使えそうな結果!


