「Electron」の版間の差分
(→Dialog) |
(→Dialog) |
||
| 513行目: | 513行目: | ||
[[File:electron_menu_role.png|300px]] | [[File:electron_menu_role.png|300px]] | ||
| + | ====コンテキストメニュー==== | ||
| + | ---- | ||
| + | *contextBridgeを利用する | ||
| + | [[File:electron_contextmenu.png|400px]] | ||
| + | |||
| + | *index.html | ||
| + | <pre> | ||
| + | function openContextMenu(e) { | ||
| + | e.preventDefault(); | ||
| + | window.api.openContextMenu("hoge"); | ||
| + | } | ||
| + | window.addEventListener('contextmenu', openContextMenu, false); | ||
| + | </pre> | ||
| + | *preload.js | ||
| + | <pre> | ||
| + | contextBridge.exposeInMainWorld( | ||
| + | "api", | ||
| + | { | ||
| + | openContextMenu: (type) => { | ||
| + | return ipcRenderer.invoke('open-context-menu', type); | ||
| + | } | ||
| + | } | ||
| + | ); | ||
| + | </pre> | ||
| + | *main.js | ||
| + | <pre> | ||
| + | const { ipcMain, BrowserWindow, Menu } = require('electron'); | ||
| + | |||
| + | ipcMain.handle('open-context-menu', (ev, msg) => { | ||
| + | var win = BrowserWindow.getFocusedWindow(); | ||
| + | let contextmenuTemplate = [ | ||
| + | { | ||
| + | label: msg, click(m ,w) { | ||
| + | alert(m + w); | ||
| + | } | ||
| + | }, | ||
| + | { type: 'separator' }, | ||
| + | { label: '切り取り', role: 'cut' }, | ||
| + | { label: 'コピー', role: 'copy' }, | ||
| + | { label: '貼り付け', role: 'paste' }, | ||
| + | ]; | ||
| + | const contextMenu = Menu.buildFromTemplate(contextmenuTemplate); | ||
| + | contextMenu.popup({window : win}); | ||
| + | }); | ||
| + | </pre> | ||
===Dialog=== | ===Dialog=== | ||
---- | ---- | ||
2021年10月4日 (月) 14:55時点における版
| Node.js | JavaScript | TypeScript | npm | Flutter |
目次
Electron
Fiddle
API Document
Required
- Node.jsのインストール
基本的なアプリの作成
- Electronアプリケーションは本質的にNode.jsアプリケーション
- Electronアプリケーションは、package.json から開始される
プロジェクトの作成とElectronのインストール
- mkdir my-electron-app && cd my-electron-app
- npm init -y
- npm i --save-dev electron
- グローバルにインストール
- npm -g i electron
mainスクリプトファイル(main.js)の作成
- mainスクリプトは、Electronアプリケーションのエントリーポイント
- Mainプロセスを開始し、Mainプロセスはアプリケーションのライフサイクルをコントロールする
- const { app, BrowserWindow } = require('electron')
- const path = require('path')
- function createWindow() {
- const win = new BrowserWindow({
- width:400,
- height:300,
- webPreferences:{
- preload: path.join(__dirname, 'preload.js')
- }
- })
- win.loadFile('index.html')
- }
- app.whenReady().then(() => {
- createWindow()
- app.on('activate', () =>{
- if (BrowserWindow.getAllWindows().length == 0) {
- createWindow()
- }
- })
- })
- app.on('window-all-closed', () => {
- if (process.platform !== 'darwin') {
- app.quit()
- }
- })
Webページ(index.html)の作成
- index.html
- アプリケーション初期化時に一度だけ表示されるページ
- このページがレンダープロセスを表現する
- <!DOCTYPE html>
- <html>
- <head>
- <meta carhset="UTF-8">
- <title>Electron Sample</title>
- <meta http-equiv="Content-Security-Policy" content="script-src 'self' 'unsafe-inline';" />
- </head>
- <body style="background: white;">
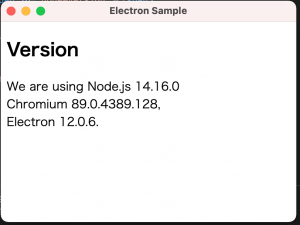
- <h2>Version</h2>
- <div>
- We are using Node.js <span id="node-version"></span>
- </div>
- <div>
- Chromium <span id="chrome-version"></span>,
- </div>
- <div>
- Electron <span id="electron-version"></span>.
- </div>
- </body>
- </html>
プレロードスクリプト(preload.js)
- Node.jsとWebページのブリッジ
- Node.js全体を安全に公開するのではなく、特定のAPIや動作をWebページに公開することができる
- 以下ではprocessオブジェクトからバージョン情報を読み取りページを更新する
- window.addEventListener('DOMContentLoaded', () => {
- const replaceText = (selector, text) => {
- const element = document.getElementById(selector);
- if (element) {
- element.innerText = text;
- }
- }
- for (const type of ['chrome', 'node', 'electron']) {
- replaceText(`${type}-version`, process.versions[type])
- }
- })
package.json
- {
- "name": "electron_sample",
- "version": "1.0.0",
- "main": "main.js",
- "scripts": {
- "start": "electron .",
- },
- :
- }
.gitignore
起動
- npm start
Visual Studio Codeでのデバッグ
launch.json Node を Visual Studio Code でデバッグするときにグローバルにインストールしたモジュールが読み込まれない
- {
- "version": "0.2.0",
- "configurations": [
- {
- "name": "Debug Main Process",
- "type": "node",
- "request": "launch",
- "cwd": "${workspaceFolder}",
- "runtimeExecutable": "${workspaceFolder}/node_modules/.bin/electron",
- "windows": {
- "runtimeExecutable": "${workspaceFolder}/node_modules/.bin/electron.cmd"
- },
- "args" : ["."],
- "outputCapture": "std"
- }
- ]
- }
パッケージングと配布
Electron Forge
- もっともシンプルで素早く配布するには、Electron Forgeを利用する
Electron ForgeをアプリケーションフォルダにImport
- $ npm install --save-dev @electron-forge/cl
- $ npx electron-forge import
- ✔ Checking your system
- ✔ Initializing Git Repository
- ✔ Writing modified package.json file
- ✔ Installing dependencies
- ✔ Writing modified package.json file
- ✔ Fixing .gitignore
- We have ATTEMPTED to convert your app to be in a format that electron-forge understands.
- Thanks for using "electron-forge"!!!
Mac 配布パッケージを作成
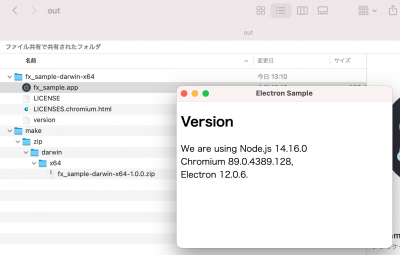
- out フォルダに出力される
- $ npm run make
- > fx_sample@1.0.0 make
- > electron-forge make
- ✔ Checking your system
- ✔ Resolving Forge Config
- We need to package your application before we can make it
- ✔ Preparing to Package Application for arch: x64
- ✔ Preparing native dependencies
- ✔ Packaging Application
- Making for the following targets: zip
- ✔ Making for target: zip - On platform: darwin - For arch: x64
- https://blog.ikappio.com/electron-forge-make-for-windows-from-macos/
- ビルド環境と同じパッケージをデフォルトで生成するようだ。
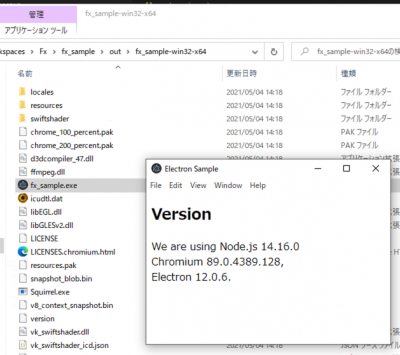
Windows配布パッケージの作成
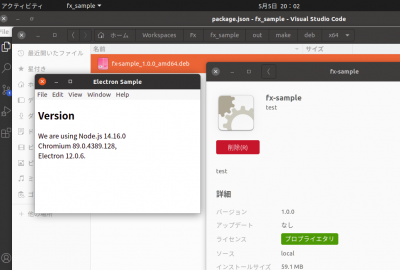
Ubuntu配布パッケージの作成
- $ sudo apt install dpkg-dev
- $ sudo apt install rpm
- $ npm run make
Electronの知識
プロセス
メインプロセスとレンダラープロセス
- main.js がメインプロセスを担い、GUIは持たない
- レンダーラープロセスは、Electronに内臓のWebブラウザを利用する
状況
2021/10現在、contextBridge利用が推奨
- nodeIntegration: true -> これで、Renderer 側で、Node api が使えていたが、今は使えない、remoteも使えない
- nodeIntegration: false, contextIsolation: false -> これで、Main と Rendererで同一のコンテキストとなるので、windowにipcReaderを登録して使える
- nodeIntegration: false, contextIsolation: true -> contextBridge を使うことで、IPC通信ができる(contextIsolation true必須
remoteオブジェクト
- レンダラープロセスから、appやBrowserWindowなどのメインプロセス専用の機能を利用したい場合に用意されている
- remoteは内部にまるでメインプロセスのモジュールが用意されているかのように振る舞う
- const { remote } = require('electron');
IPC(プロセス間通信)
- IPCについて
- メインプロセスとレンダラープロセスで情報を授受する場合、IPCを利用する
- ページAからページBを操作したい場合など、メッセージを ページA->メインプロセス->ページBと連携させる必要がある
ipcMain,ipcRenderer
- main.js Window生成
- preload.js
- contextIsolation: false
- let win = new BrowserWindow({
- width: 600,
- height: 400,
- webPreferences:{
- contextIsolation: false, // window object共有
- preload: path.join(__dirname, 'preload.js')
- // nodeIntegration: true,
- // enableRemoteModule: true
- }
- });
- // win.loadURL('https://service.typea.info/blogwiki');
- win.loadFile('index.html');
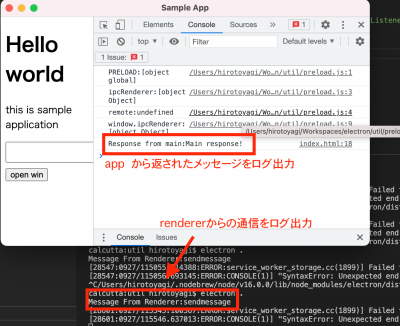
- main.js 通信
- const { ipcMain } = require('electron');
- ipcMain.handle('invoke-test', (ev, msg) => {
- console.log("Message From Renderer:" + msg);
- return "Main response!";
- });
- preload.js
- contextIsolation: false, // window object共有
- const { ipcRenderer } = require('electron');
- window.ipcRenderer = ipcRenderer;
- index.html
- <script>
- ipcRenderer.invoke('invoke-test','sendmessage').then((data) => {
- console.log("Response from main:" + data);
- });
- </script>
contextBridge
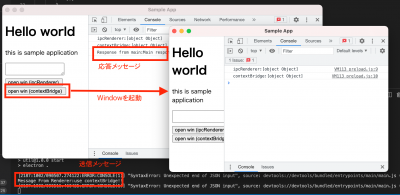
contextBridgeを使えば、nodeIntegration: false,contextIsolation: trueでもIPC通信できる
Context Isolationは、プリロードスクリプトとElectronの内部ロジックが、webContentsでロードするWebサイトとは別のコンテキストで実行されるようにする機能です。これは、WebサイトがElectronの内部やプリロードスクリプトがアクセスできる強力なAPIにアクセスできないようにするためのセキュリティ上の重要な機能です。
つまり、プリロードスクリプトがアクセスできるウィンドウオブジェクトは、実際にはWebサイトがアクセスできるオブジェクトとは異なるものです。例えば、プリロードスクリプトでwindow.hello = 'wave'と設定し、コンテキストアイソレーションを有効にした場合、ウェブサイトがwindow.helloにアクセスしようとすると、window.helloは未定義となります。
コンテキスト分離はElectron 12からデフォルトで有効になっており、すべてのアプリケーションで推奨されるセキュリティ設定です。
- main.js Window生成
- contextBridgeを使う場合、contextIsolation:true とする必要あり
- let win = new BrowserWindow({
- width: 600,
- height: 400,
- webPreferences:{
- contextIsolation: true, // false -> window object共有、contextBridge利用時はtrue
- preload: path.join(__dirname, 'preload.js'),
- // enableRemoteModule: false
- // nodeIntegration: true,
- }
- });
- // win.loadURL('https://service.typea.info/blogwiki');
- win.loadFile('index.html');
- main.js 通信
- const { ipcMain } = require('electron');
- ipcMain.handle('invoke-test', (ev, msg) => {
- console.log("Message From Renderer:" + msg);
- return "Main response!";
- });
- preload.js
- const electron = require('electron');
- const { ipcRenderer, contextBridge } = electron;
- contextBridge.exposeInMainWorld(
- "api",
- {
- openWinWitMessage: (message) => {
- ipcRenderer.invoke('invoke-test', message).then((data) => {
- console.log("Response from main:" + data);
- });
- }
- }
- );
- index.tml
- function openWinContextBridge() {
- window.api.openWinWitMessage("use contextBridge!!");
- }
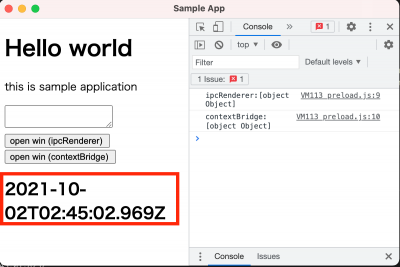
contextBridge(main から rendelerの呼び出し)
- main.js
- 1秒ごとに時間を送信
- let win = new BrowserWindow({
- width: 600,
- height: 400,
- webPreferences:{
- preload: path.join(__dirname, 'preload.js'),
- }
- });
- win.loadFile('index.html');
- setInterval(() => {
- var now = new Date().toISOString();
- console.log(now);
- win.webContents.send('timer', now);
- }, 1000);
- preload.js
- const electron = require('electron');
- const { ipcRenderer, contextBridge /*remote*/ } = electron;
- contextBridge.exposeInMainWorld(
- "api",
- {
- on: (channel, callback) => {
- ipcRenderer.on(channel, (event, argv)=>callback(event, argv))
- }
- }
- );
- index.html
- window.api.on('timer', (event, time)=>{
- document.getElementById('timer').innerText = time;
- });
オブジェクト
app
- アプリケーション本体
- 起動/終了、Windowオープン/クローズなどの管理
BrowserWindow
- Electronアプリで表示されるウィンドウオブジェクト
- HTMLファイルを読み込むことでウィンドウを表示する
WebContents
- BrowserWindowに含まれ、Webコンテンツの状態管理
- Webコンテンツに関するイベント
BrowserView
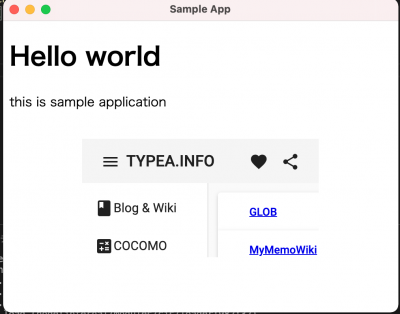
- BrowserWindowでloadFile、、loadURLを使って表示するコンテンツに、さらにWebコンテンツを埋め込む
- BrowserWindow内部に小さな内部Windowのようなものを追加し、別コンテンツを表示できる
- const view = new BrowserView();
- view.webContents .loadURL('https://service.typea.info/blogwiki');
- win.setBrowserView(view);
- view.setBounds({
- x : 100,
- y : 150,
- width : 300,
- height : 150
- });
Menu
- Menu,MenuItem
- clickイベント
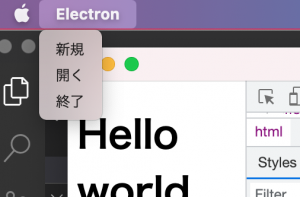
- let menu = new Menu();
- let menuFile = new MenuItem({
- label: 'ファイル',
- submenu: [
- { label: '新規2', click: () => { console.log('新規2'); } },
- new MenuItem({ label: '開く' }),
- new MenuItem({ label: '終了' }),
- ]
- });
- menu.append(menuFile);
- Menu.setApplicationMenu(menu);
テンプレートからメニューを作成する
- セパレータは、type: 'separator'
- let menuFileTemplate = [
- {
- label: 'ファイル',
- submenu: [
- { label: '新規2', click: () => { console.log('新規2'); } },
- { label: '開く2' },
- { type: 'separator' },
- { label: '終了2' },
- ]
- }
- ];
- menu = Menu.buildFromTemplate(menuFileTemplate);
- Menu.setApplicationMenu(menu);
role
- roleを指定するとロールの機能が組み込まれる
- about
- undo
- redo
- cut
- copy
- paste
- pasteAndMatchStyle
- selectAll
- delete
- minimize
- close
- quit
- reload
- forceReload
- toggleDevTools
- togglefullscreen
- resetZoom
- zoomIn
- zoomOut
- fileMenu
- editMenu
- viewMenu
- windowMenu
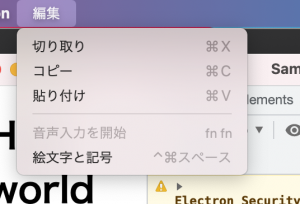
- {
- label: '編集',
- submenu: [
- { label: '切り取り', role: 'cut' },
- { label: 'コピー', role: 'copy' },
- { label: '貼り付け', role: 'paste' },
- ]
- }
コンテキストメニュー
- contextBridgeを利用する
- index.html
- function openContextMenu(e) {
- e.preventDefault();
- window.api.openContextMenu("hoge");
- }
- window.addEventListener('contextmenu', openContextMenu, false);
- preload.js
- contextBridge.exposeInMainWorld(
- "api",
- {
- openContextMenu: (type) => {
- return ipcRenderer.invoke('open-context-menu', type);
- }
- }
- );
- main.js
- const { ipcMain, BrowserWindow, Menu } = require('electron');
- ipcMain.handle('open-context-menu', (ev, msg) => {
- var win = BrowserWindow.getFocusedWindow();
- let contextmenuTemplate = [
- {
- label: msg, click(m ,w) {
- alert(m + w);
- }
- },
- { type: 'separator' },
- { label: '切り取り', role: 'cut' },
- { label: 'コピー', role: 'copy' },
- { label: '貼り付け', role: 'paste' },
- ];
- const contextMenu = Menu.buildFromTemplate(contextmenuTemplate);
- contextMenu.popup({window : win});
- });
Dialog
contextBridge を使用してファイル選択ダイアログを表示する
- BrowserWindow.getFocusedWindow() で Windowハンドルを得る
- main.js
- const { ipcMain, dialog } = require('electron');
- ipcMain.handle('open-file-dialog', async (ev, msg) => {
- var win = BrowserWindow.getFocusedWindow();
- var result = await dialog.showOpenDialog(win, { properties: ['openFile', 'multiSelections'] });
- if (result.canceld) {
- return [];
- }
- return result.filePaths;
- });
- preload.js
- const electron = require('electron');
- const { ipcRenderer, contextBridge } = electron;
- contextBridge.exposeInMainWorld(
- "api",
- {
- openFileDialog: (message) => {
- return ipcRenderer.invoke('open-file-dialog', message);
- }
- }
- );
- index.html
- async function openWinFileDialog() {
- var filePaths = await window.api.openFileDialog("");
- alert(filePaths[0]);
- }
構成
main.js
- const { app, BrowserWindow} = require('electron');
- function createWindow() {
- let win = new BrowserWindow({
- width: 400,
- height: 200,
- webPreferences:{
- contextIsolation: false, // window object共有
- preload: path.join(__dirname, 'preload.js')
- // nodeIntegration: true,
- // enableRemoteModule: true
- }
- });
- win.loadFile('index.html');
- }
- app.whenReady().then(createWindow);
オブジェクトの分割代入
- const { app, BrowserWindow} = require('electron');
Preloadスクリプト
プリロードスクリプトには、ウェブコンテンツの読み込み開始前にレンダラープロセスで実行されるコードが含まれています。これらのスクリプトはレンダラーのコンテキスト内で実行されますが、Node.jsのAPIにアクセスできるため、より多くの権限が与えられています。
Node.js機能の統合
- trueでNode.jsの機能(通常のWebで使用できないrequireなど)を利用できるようになる
- nodeIntegration: true
remoteモジュールの有効化
- remoteモジュールの有効化
- enableRemoteModule: true
- https://www.electronjs.org/docs/tutorial/security
- Do not enable Node.js Integration for Remote Content
リモートコンテンツを読み込むレンダラー(BrowserWindow、BrowserView、<webview>)では、Node.jsの統合を有効にしないことが最も重要です。この目的は、リモートコンテンツに与える権限を制限することで、攻撃者がウェブサイト上でJavaScriptを実行できるようになった場合に、ユーザーに危害を加えることを劇的に難しくすることです。
この後、特定のホストに対して追加の権限を付与することができます。例えば、https://example.com/ に向けてBrowserWindowを開いている場合、そのWebサイトが必要とする能力を正確に与えることができますが、それ以上はできません。
Webページをロード
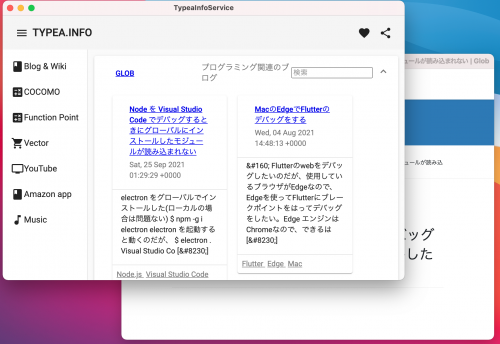
- loadURLとすることで、外部ページをロードできる
- // win.loadFile('index.html');
- win.loadURL('https://service.typea.info/blogwiki');
- WebページをElectronアプリ化
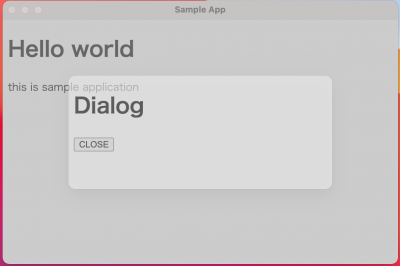
モーダルダイアログ
- function createWindow() {
- let win = new BrowserWindow({
- width: 600,
- height: 400,
- webPreference: {
- nodeIntegration: true,
- enableRemoteModule
- }
- });
- // win.loadURL('https://service.typea.info/blogwiki');
- win.loadFile('index.html');
- let child = new BrowserWindow({
- width: 400,
- height: 200,
- parent: win,
- frame: false,
- modal: true,
- transparent: true,
- opacity: 0.5
- });
- child.loadFile('dialog.html');
- }
デベロッパーツールを開く
- win.webContents.openDevTools();
appオブジェクトのイベント
起動処理の完了
will-finish-launching
初期化処理完了
ready
BrowserWindowの生成
browser-window-created
Webコンテンツの生成
web-contents-created
全てのWindowが閉じられた
window-all-closed
全てのWindowを閉じる前
before-quit
終了する前
will-quit
終了時
quit
BrowserWindowのイベント
Windowの表示
show
Windowの非表示
hide
Window表示準備完了
ready-to-show
Windowを閉じる
close
Windowが閉じられた
closed
その他
- focus
- blur
- maximize
- unmaximize
- minimize
- restore
- will-resize
- resize
- will-move
- move
- enter-full-screen
- leave-full-screen
- enter-html-full-screen
- leave-html-full-screen
- always-on-top-changed
BrowseWindow操作
- destory
- close()
- focus()
- blur()
- isFocuced()
- isDestoryed()
- show()
- showInactive()
- hide()
- isVisible()
- isModal()
- maximize()
- unmaximize()
- isMaximized()
- minimize()
- restore
- isMinimized()
- setFullScreen()
- isFullScreen()
- isNormal()
- SetBounds()
- GetBounds()
- SetContentBounds()
- GetContentsBound()
- SetSize()
- GetSize()
- SetContaentSize()
- GetContentSize()
- SetMinimumSize()
- GetMinimumSize
- SetMaximumSize()
- GetMaximumSize()
- SetPosition()
- GetPosition()
- moveTop()
- center()
- settitle()
- getTitle()
WebContentsのイベント
コンテンツロード完了
did-finish-load
フレームのコンテンツロード
did-frame-finish-load
コンテンツ読み込み開始
did-start-loading
コンテンツ読み込み中止
did-stop-loading
DOM生成完了
dom-ready
新しいWindow作成
new-window
URLアクセス時
will-navigate
URLアクセス開始
did-start-navigation
その他
- will-redirect
- did-redirect-navigation
- did-navigate
- will-prevent-unload
- destroyed
- enter-html-full-screen
- leave-html-full-screen
- zoom-changed
- devtools-opend
- devtools-closed
- devtools-focused
- console-message
© 2006 矢木浩人

