「Cloud Functions」の版間の差分
ナビゲーションに移動
検索に移動
(→ローカル実行) |
|||
| (同じ利用者による、間の18版が非表示) | |||
| 7行目: | 7行目: | ||
===ローカル実行=== | ===ローカル実行=== | ||
| + | *Firebase エミュレータを呼び出す | ||
| + | **package.json で定義された、firebase emulators:start を実行 | ||
*https://firebase.google.com/docs/functions/local-emulator | *https://firebase.google.com/docs/functions/local-emulator | ||
| + | <pre> | ||
| + | $ npm install -g firebase-tools | ||
| + | $ cd functions | ||
| + | $ npm run serve | ||
| + | </pre> | ||
| + | ===[[Express]]と統合=== | ||
| + | *https://taroosg.io/cloud-functions-express | ||
| + | <pre> | ||
| + | $ npm install --save express | ||
| + | $ npm install --save-dev @types/express | ||
| + | </pre> | ||
| + | *index.ts | ||
<pre> | <pre> | ||
| − | + | import * as functions from 'firebase-functions'; | |
| + | import * as express from 'express'; | ||
| + | const app: express.Express = express(); | ||
| + | |||
| + | const router: express.Router = express.Router() | ||
| + | app.use(router); | ||
| + | |||
| + | router.post('/test', (req, res) => { | ||
| + | res.send('TEST!'); | ||
| + | }); | ||
| + | |||
| + | export const api = functions.https.onRequest(app); | ||
</pre> | </pre> | ||
| − | * | + | ===https.onCall のプロトコル仕様=== |
| − | * | + | *https://firebase.google.com/docs/functions/callable-reference |
| − | + | *呼び出し可能なトリガー エンドポイントへの HTTP リクエストは、次のヘッダーが含まれる POST にする必要があります。 | |
| − | * | + | **必須: Content-Type: application/json |
| + | **省略可: Authorization: Bearer <token>:リクエストを行うログイン済みユーザーの Firebase Authentication ユーザー ID トークンです。このトークンはバックエンドで自動的に検証され、ハンドラの context で使用可能になります。トークンが有効でない場合、リクエストは拒否されます。 | ||
| + | **省略可: Firebase-Instance-ID-Token: <iid>:Firebase クライアント SDK の FCM 登録トークンです。これには文字列を設定する必要があります。またハンドラの context で使用できます。プッシュ通知のターゲティングに使用されます。 | ||
| + | |||
| + | ===カスタムドメイン=== | ||
| + | *https://blog.katsubemakito.net/firebase/cloudfunctions-restfulapi-domain-rewrite | ||
| + | *https://firebase.google.com/docs/hosting/full-config?hl=ja | ||
| + | *https://firebase.google.com/docs/hosting/full-config?hl=ja#rewrites | ||
| + | *[https://firebase.google.com/docs/hosting/full-config?hl=ja#glob_pattern_matching globパターンマッチング] | ||
| + | #Hostingと併用することで対応 | ||
| + | #Hostingに対してカスタムドメインを設定 | ||
| + | #firebase.json の hosting の rewrite に functions を追加 | ||
| + | |||
| + | *Functions | ||
<pre> | <pre> | ||
| − | + | import * as functions from 'firebase-functions'; | |
| − | + | import * as express from 'express'; | |
| + | |||
| + | const app: express.Express = express(); | ||
| + | |||
| + | router.get('/api/test', (req, res) => { | ||
| + | res.send('TEST!'); | ||
| + | }); | ||
| + | |||
| + | export const apiService = functions.https.onRequest(app); | ||
</pre> | </pre> | ||
| − | * | + | *firebase.json |
| + | **パスもapi、公開(export)する関数も apiだと、パスにマッチしないため、別の名前にする | ||
<pre> | <pre> | ||
| − | + | "hosting": [ | |
| + | { | ||
| + | : 省略 | ||
| + | "rewrites": [ | ||
| + | { | ||
| + | "source": "/api/**", | ||
| + | "function": "apiService" | ||
| + | }, | ||
| + | { | ||
| + | "source": "**", | ||
| + | "destination": "/index.html" | ||
| + | } | ||
| + | ] | ||
| + | } | ||
| + | ] | ||
</pre> | </pre> | ||
| + | *実行 | ||
| + | [[File:functions_custom_domain.png|400px]] | ||
2020年11月9日 (月) 14:04時点における最新版
| Google Cloud Platform | Firebase |
Cloud Functions
- Cloud Functions for Firebase
- Firebase CLI プロジェクトの Google Cloud Functions へファイルをアップロードして、Google Cloud Storageへ保存するコードをTypeScriptで書く
- Cloud Function関連ブログ
- Firebase関連ブログ
ローカル実行
- Firebase エミュレータを呼び出す
**package.json で定義された、firebase emulators:start を実行
$ npm install -g firebase-tools
$ cd functions
$ npm run serve
Expressと統合
$ npm install --save express
$ npm install --save-dev @types/express
- index.ts
import * as functions from 'firebase-functions';
import * as express from 'express';
const app: express.Express = express();

const router: express.Router = express.Router()
app.use(router);

router.post('/test', (req, res) => {
    res.send('TEST!');
});

export const api = functions.https.onRequest(app);
https.onCall のプロトコル仕様
- https://firebase.google.com/docs/functions/callable-reference
- 呼び出し可能なトリガー エンドポイントへの HTTP リクエストは、次のヘッダーが含まれる POST にする必要があります。
- 必須: Content-Type: application/json
- 省略可: Authorization: Bearer <token>:リクエストを行うログイン済みユーザーの Firebase Authentication ユーザー ID トークンです。このトークンはバックエンドで自動的に検証され、ハンドラの context で使用可能になります。トークンが有効でない場合、リクエストは拒否されます。
- 省略可: Firebase-Instance-ID-Token: <iid>:Firebase クライアント SDK の FCM 登録トークンです。これには文字列を設定する必要があります。またハンドラの context で使用できます。プッシュ通知のターゲティングに使用されます。
カスタムドメイン
- https://blog.katsubemakito.net/firebase/cloudfunctions-restfulapi-domain-rewrite
- https://firebase.google.com/docs/hosting/full-config?hl=ja
- https://firebase.google.com/docs/hosting/full-config?hl=ja#rewrites
- globパターンマッチング
- Hostingと併用することで対応
- Hostingに対してカスタムドメインを設定
- firebase.json の hosting の rewrite に functions を追加
- Functions
import * as functions from 'firebase-functions';
import * as express from 'express';

const app: express.Express = express();

router.get('/api/test', (req, res) => {
    res.send('TEST!');
});

export const apiService = functions.https.onRequest(app);
- firebase.json
- パスもapi、公開(export)する関数も apiだと、パスにマッチしないため、別の名前にする
  "hosting": [
    {
         : 省略
      "rewrites": [
        {
          "source": "/api/**",
          "function": "apiService"
        },
        {
          "source": "**",
          "destination": "/index.html"
        }
      ]
    }
  ]
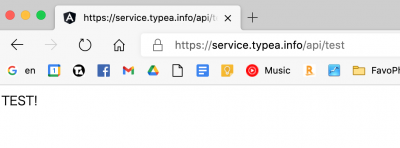
- 実行
© 2006 矢木浩人
